 »
[Filters] Filter buttons
»
[Filters] Filter buttons
Content
My AddOns
|
FCO ItemSaver
[Filters] Filter buttons
|
|
If enabled in the settings you can use up to 4 filter buttons, located at the bottom of each of your panels (inventory, trade, mail, bank, guild bank, vendor, ...).
 The 4 buttons are located at the bottom line of your panel, e.g. the inventory. You are able to move the position of the buttons via the settings menu as well. Each panel got it's own positioning submenu in the settings. The buttons ca be clicked via the left mouse button, or used via keybindings. They will change their behaviour between 3 possible states: 1st state - Green button: The filter is enabled, means the items with this marker icon are filtered (not visible). 2nd state - Yellow button: The filter is partially enabled, means ONLY the items with this marker icon are shown and all othe ritems are filtered (not visible). 3rd state - Red button: The filter is disabled, means the items with this marker icons are not filtered (visible). The filter button's state (red, yellow, green) will be remembered at each panel that you open so you can define the filters to e.g. hide gear at the "bank deposit" tab so you do not accidantly deposit it. Or you define to only show non-protected items at the vendor sell tab. Or only show crafted items (See FAQ bout dynamic marker icons -> crafted example) at the crafting improvement tab. The 4 buttons contain different marker icons 1st button: -Lock icon -All "dynamic icons" setup as non-gear marker icons 2nd Button: -All gear sets -All "dynamic icons" setup as gear marker icons 3rd button: -Research -Deconstruction -Improvement 4th button: -Sell -Sell in guild store -Intricate Position &size of the filter buttons There are several addons adding info at the bottom line of the inventory. You may need to move the FCOIs filter buttons more to the left or right then, or change their size. Use the FCOItemSaver settings -> filter -> filter buttons -> filter button position to move and/or change the filter buttons size. There exists 1 submenu for each filter panel (inventory, bank deposit, etc.) where you can move the filter buttons. Just enter different position value in the edit fields, like increase (move right) or decrease (move left) the number value. Acknowledge the changed values by pressing the return key! Use the sliders to change the size of the filter buttons. You can use the "Set all the same" button above of the submenus in order to set all positions and size of the filter buttons the same like your chosen values in the "Inventory" submenu (1st submenu). Context menus at filter buttons 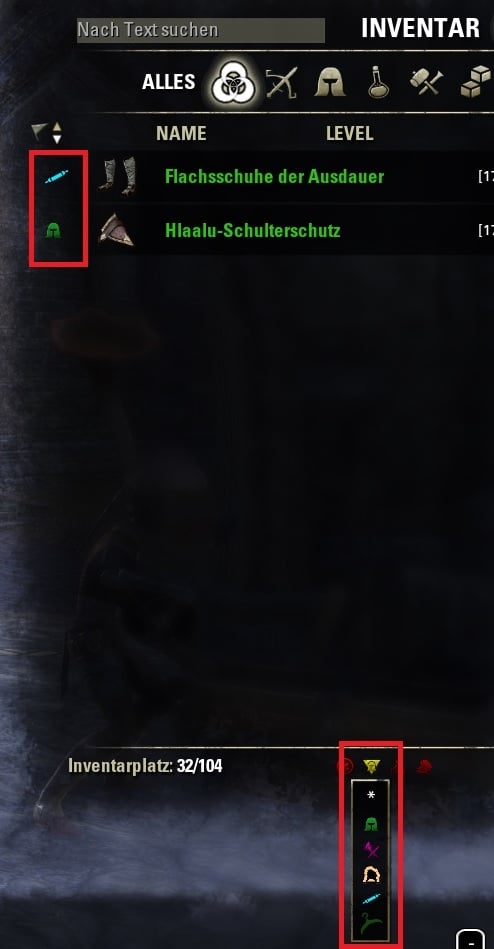 If enabled in the settings (Settings -> Context menus > Filter button context menus) you can right click the filter buttons to show a context menu containing the marker icons attached to this filter button. e.g. if you right click the 2nd filter button "Gears" you'll get a list of the gear marker icons and dynamic icons enabled as gear. Left click one of these marker icons in the context menu so the filter button will change it's icon to the selected icon, and the inventory will filter only this selected marker icon, if you change the filter state (color) of the filter button. e.g. If you then left click the filter button again the filter will only apply to this selected marker icon shown on the button! Right click the filter button again and choose the * character to reset the filter button to ALL marker icons below the filter. |
AddOn Sites
© 2014 - 2022 MMOUI
vBulletin © 2024, Jelsoft Enterprises Ltd